
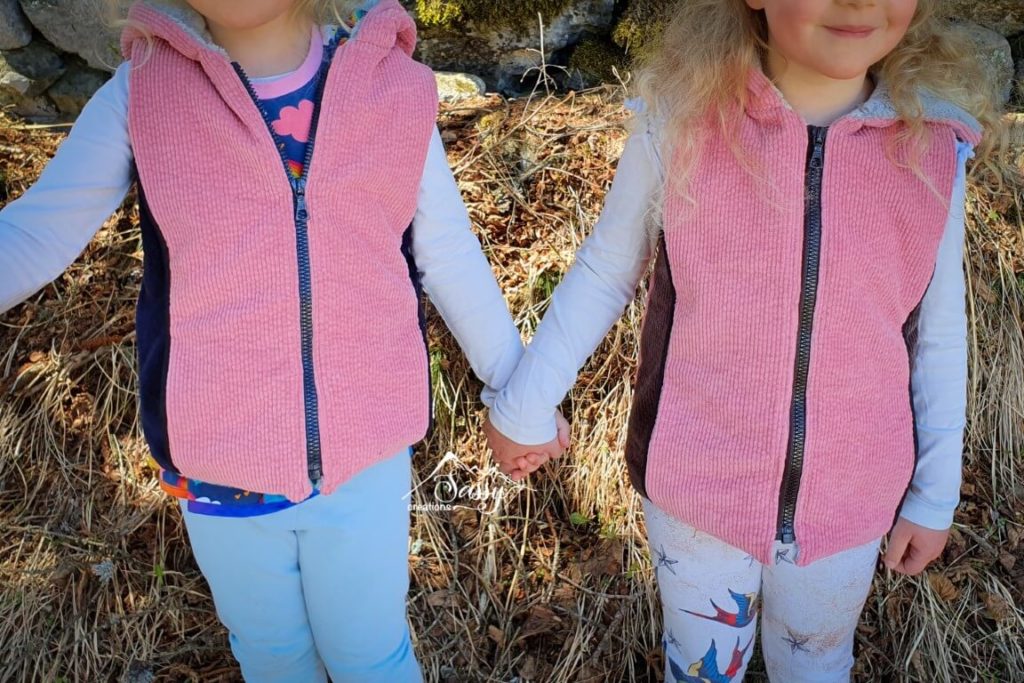
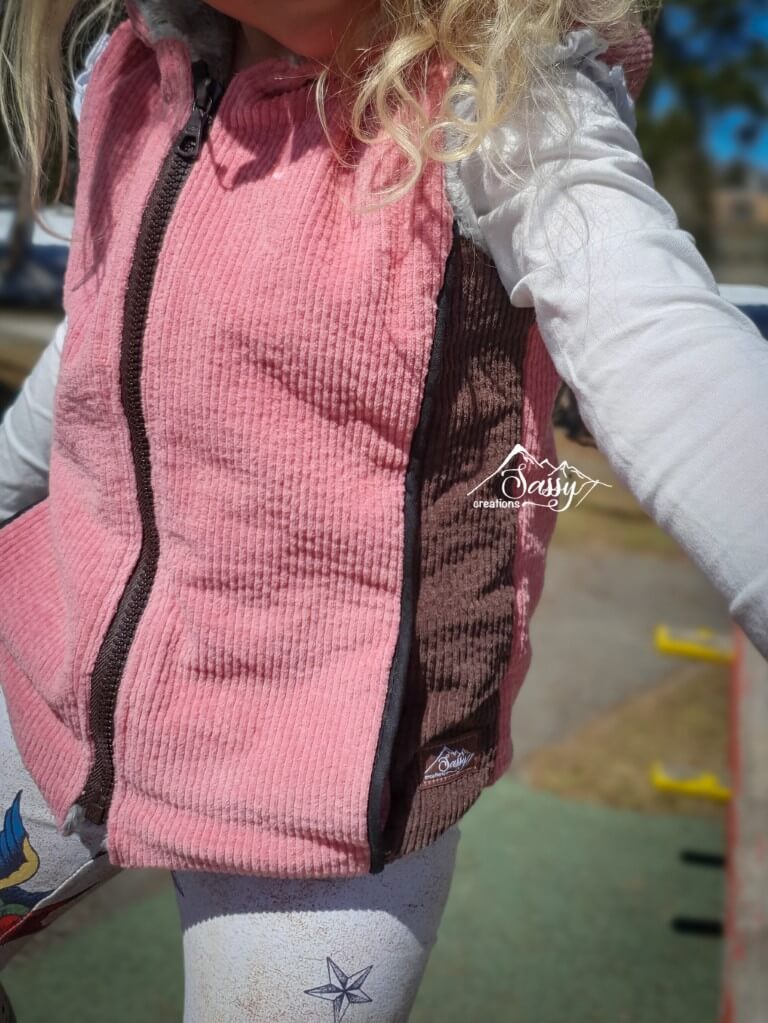
Hi there! I'm Anisha, honored to be a part of the team here at Sew PDF, and I have a blog tutorial for you today on the Hedgehog Hoodie by Tie Dye Diva! I will cover adding piping to the princess seams while using pockets and how I did the zippers on these vests for my girls.
You can get your copy of this pattern on sale here until May 3rd 2021!
We'll start with the piping, since that gets sewn on first:
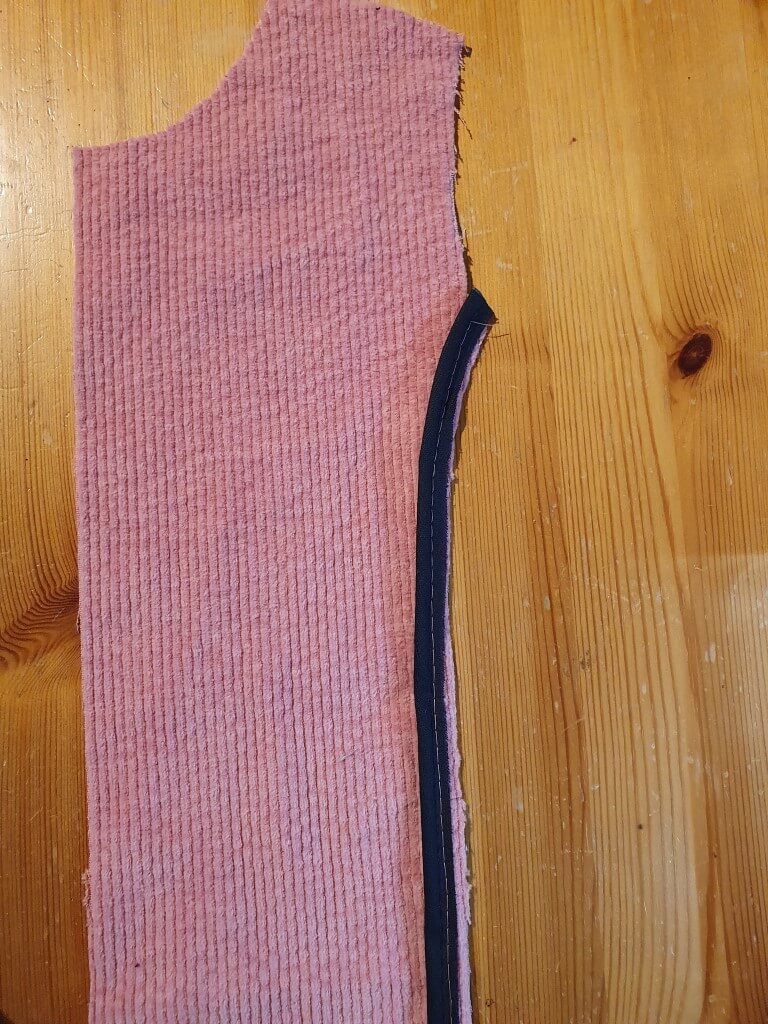
Take your Front Centre Panel and your Front Side pieces to hand. Lay your piping along the curved edge of your Front Centre Panel which will connect to the Front Side. I pinned mine in place for the first few inches, and then adjusted as I went, but you could also use double sided tape to keep it in place. Since the seam allowance is 3/8" for this pattern and my piping only has a 1/4" seam allowance on it, I moved it 1/8" in from the raw edge of my Front Centre Panel.
Baste the piping in place inside the seam allowance with a long straight stitch, using your zipper foot (if you used double sided tape, you can skip the basting). In between the pocket T-notches, sew the piping in place along the 3/8" seam line. You could sew it in place along the whole length of the piping if you like, but I prefer not to because sometimes that seam is visible after attaching the other side. You want to sew the piping on the 3/8" seam line between the pocket notches because the seam allowance for sewing on the pocket bag is only 1/4", so then it wouldn't be sewn on properly.

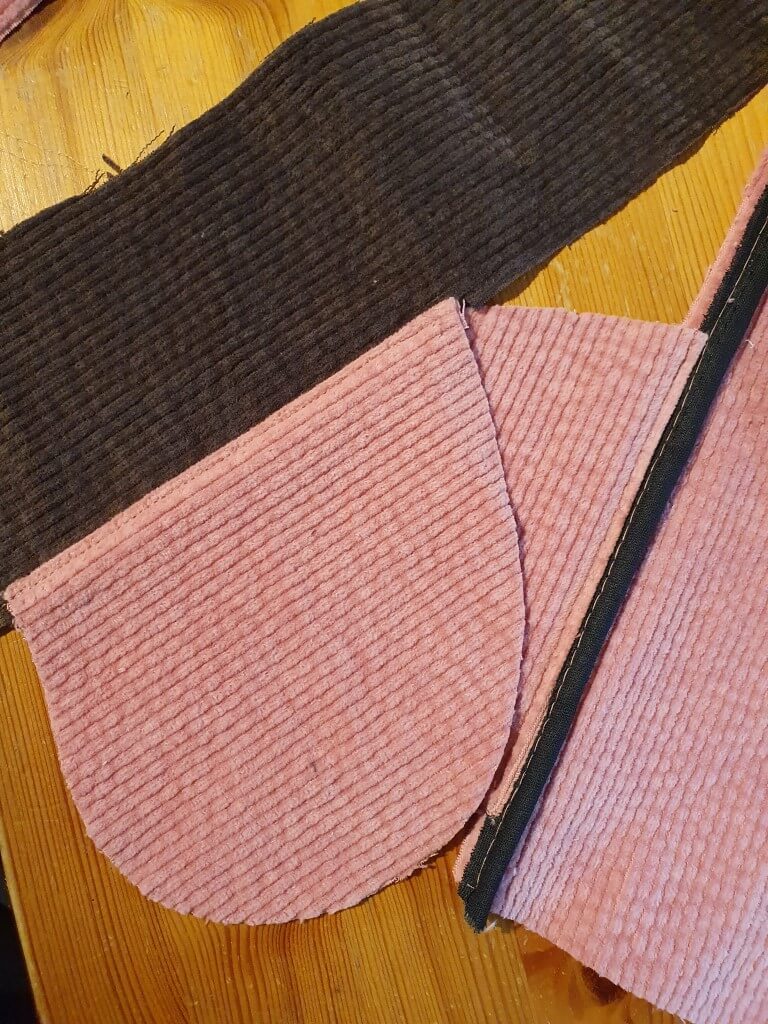
Next come the pocket bags. Attach them as described in the tutorial, you will just be sandwiching the piping between the pocket bag piece and the main fabric of the Front Centre Panel. In the middle photo below I've sewn the pocket bags with the 1/4" seam allowance as in the tutorial, and then I added a little step: I flipped them out and understitched the pocket bag piece to the seam allowance. This helps the pocket bag stay in place at the opening and generally creates less bulk at the pocket opening.
Continue sewing the Side Front to the Centre Front Panel as described in the tutorial. And there you have it! Piping with the pocket! 😀


Okay, on to the zipper!
Continue assembling the Hoodie as described in the tutorial, up to and including Step 4 on page 6.
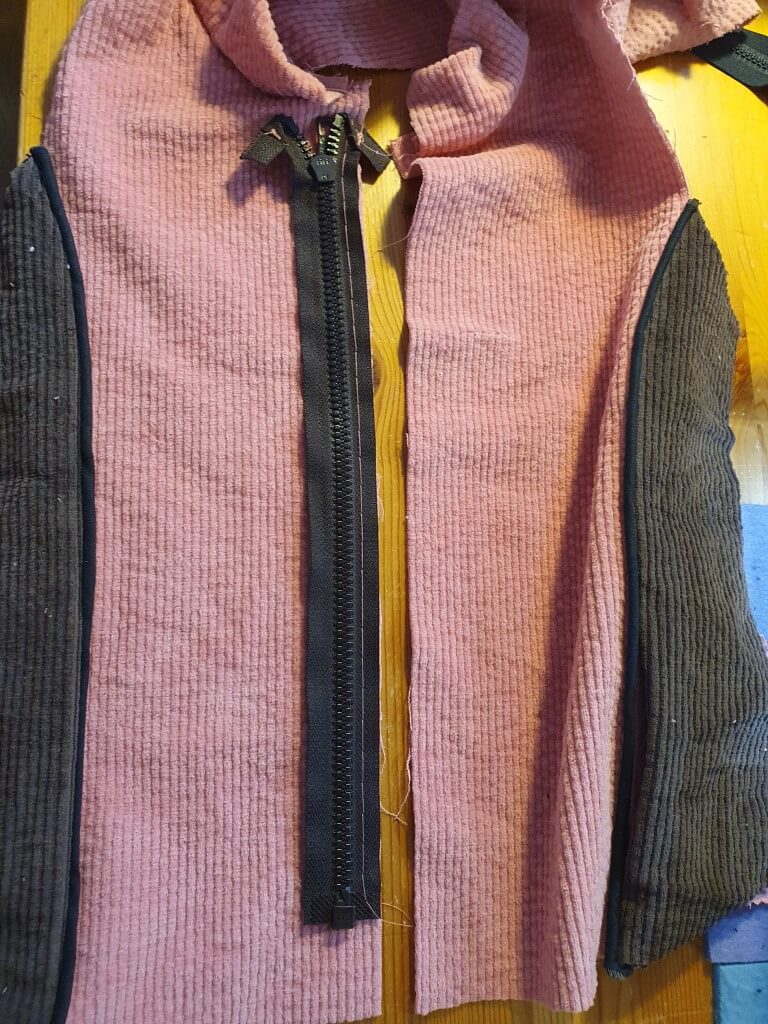
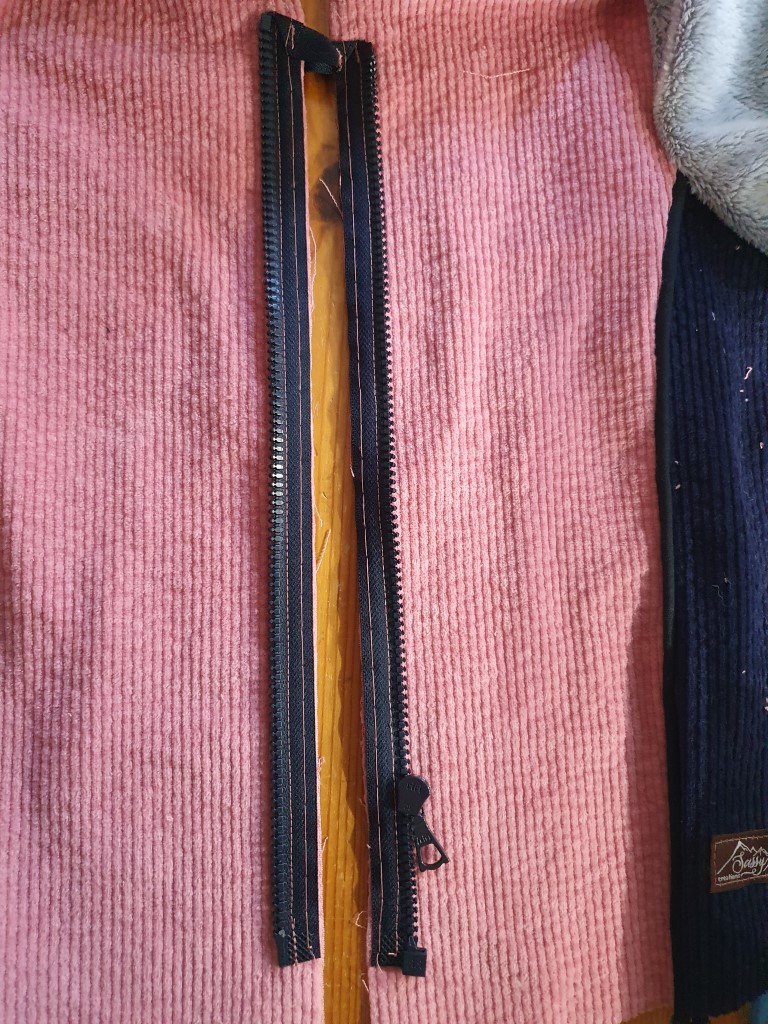
The method I'm using has a zipper "fitted" to the length of the front panel. Since I can only get zipper lengths in 5cm steps (unless I special order them, of course) my zipper is 4cm shorter than the front length. But that's not a problem at all! Especially since my girls usually don't zip up their zippers all the way anyway lol. I split the difference on mine, but you could also line up the top of the zipper with the hood seam and leave a larger gap at the bottom.
Okay, so first off, fold back the extra zipper tape at the top of the zipper by folding it towards the back at a 90-degree angle, then that piece over itself again towards the bottom of the zipper as shown below (I have my zipper face down on my desk in the first two photos). Tack that in place. I used pink thread here so that you could see it. *cough cough - or because I'm lazy and didn't want to change my sewing machine thread - cough cough*


Place the zipper face down onto the right side of the Front Centre Panel and pin it in place or use double sided tape to get it to stay. You can separate it at this point, I like to keep it together for the first side so that I'm sure it's facing the right way. Baste it in place inside the seam allowance using a long straight stitch (skip basting if you used double sided tape). If you haven't already separated your zipper, do that now and line up your front edges so that the top and bottom are even. Slide the other side of the zipper over onto the other Front Centre Panel and line it up with the first one. Pin and baste or use double sided tape here as well. I choose the pin and baste method because after I've basted, I can zip up my zipper to check that they really do line up. Zippers are tricky things; sometimes they'll look even while sewing and then when they're zipped, they'll be crooked! So I baste and test.
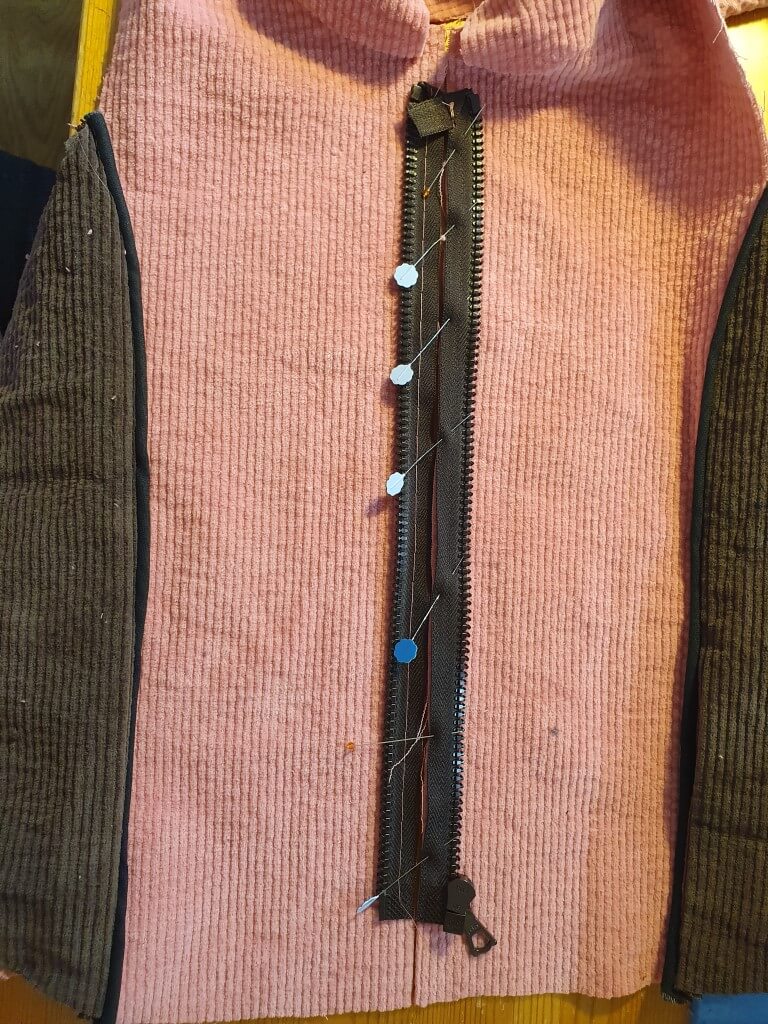
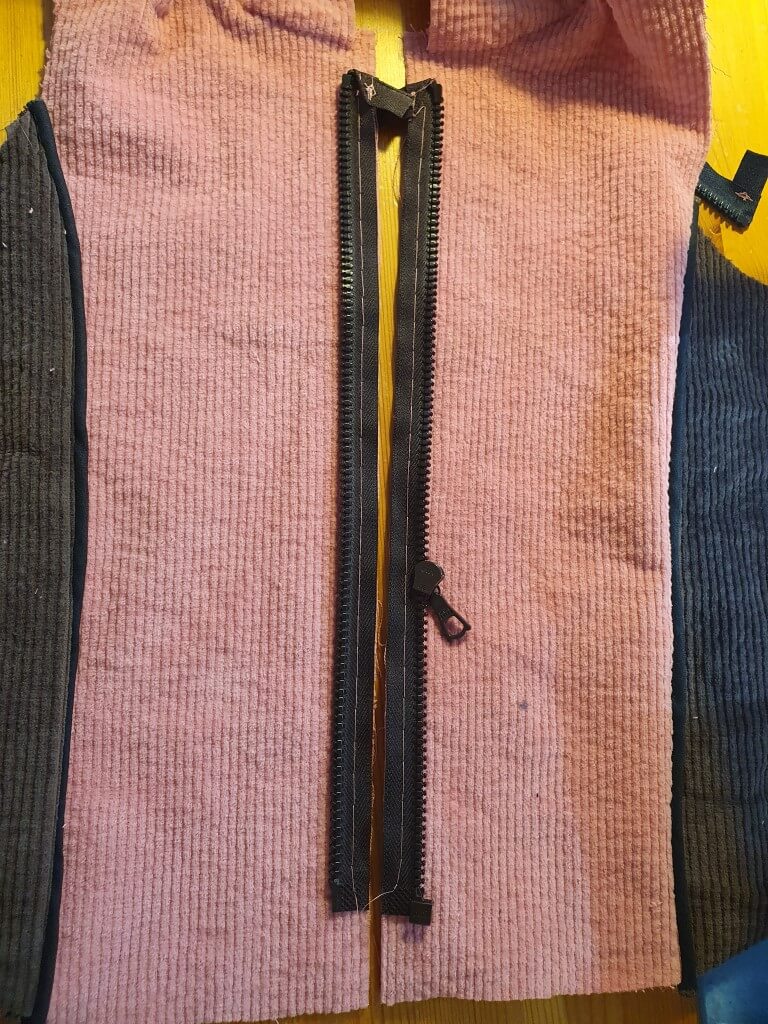
As you can see below left, I'm glad I did! So I pulled out that basting on the second side and tried again. That time it lined up, so I sewed the zipper on properly - my front pieces are a bit skewed in that 3rd image, but I promise, they line up!

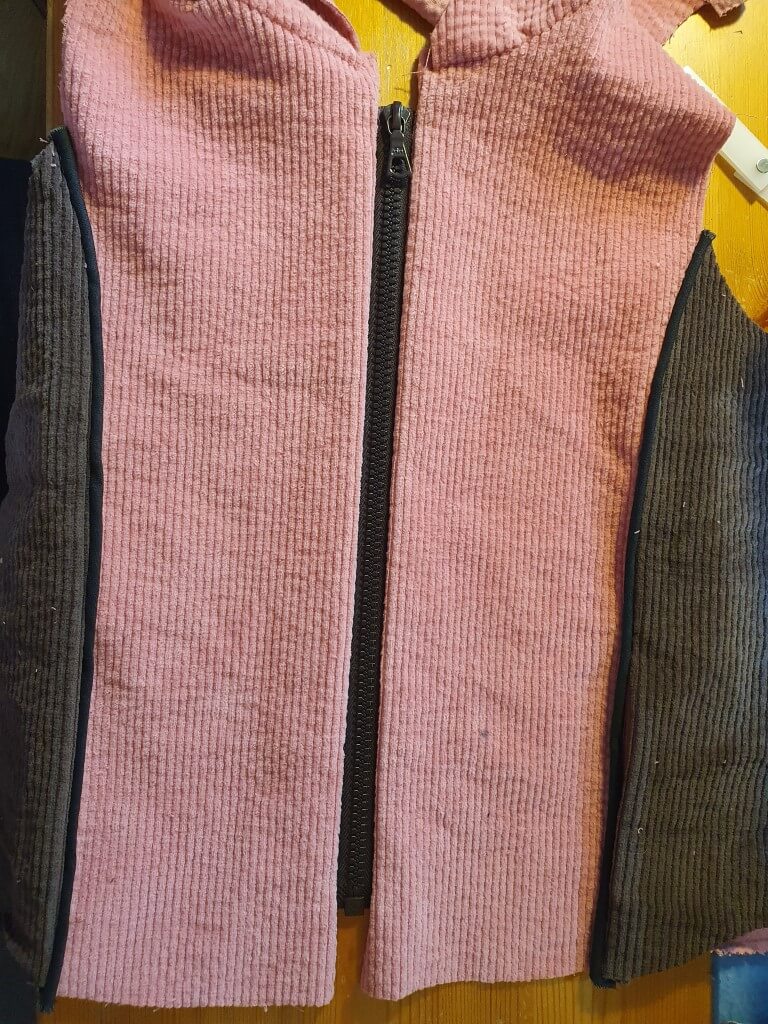
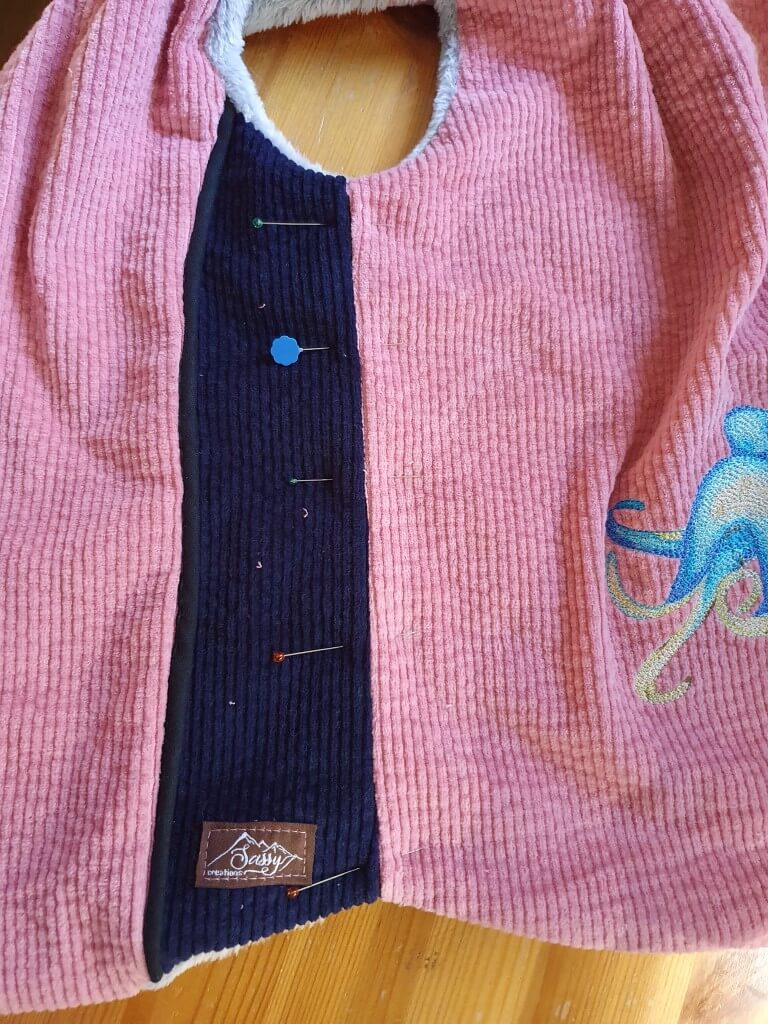
Then you can continue assembling the rest of the Hoodie as per tutorial! One thing I want to note as well: when I sew zippers, I like to always sew them in the same direction. In other words, either both sides from the top, or both sides from the bottom. So, when attaching the lining, I did the zipper section in two separate steps. My lining on these ones was a very plush, double sided minky-type fabric (upcycled fluffy blanket), so I sewed both sides from the top down to follow the direction of the nap. Same with the corduroy. But I would do that with a fabric without nap as well.
Speaking of fluffy...this lining was so soft and plush, it kept slipping around! I didn't want to understitch after sewing the main and lining together because in my experience, that makes it less voluminous at the edges and I wanted to keep that volume. But after topstitching the zipper, it still didn't stay put. So, what I did, was pin the side seams together after having closed the turning hole. Making sure they were nicely lined up, I stitched in the ditch from the right side of the Hoodie to keep that lining in place. I did the same thing on the shoulder seams and the around the neck seam where the hood attached to the body, and then topstitched the hood opening 5/8" in from the edge. That lining's not going anywhere now, and I still have the soft, fluffy edges!


And we're done! Thanks for reading, and I hope you share your Hedgehog Hoodie when you've made one!
Cheers,
Anisha