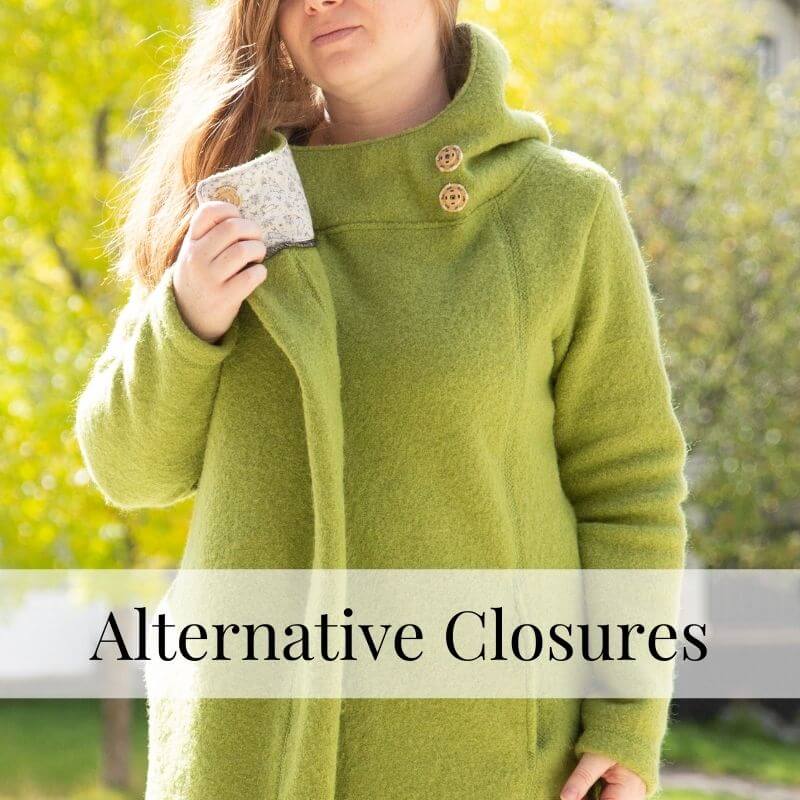
Do you hate sewing button holes? We get it, plenty of our team members do too, including myself! Many people sew button holes regularly and don't mind them at all, but when you don't sew them very often, they can seem quite finicky and time consuming.
Thankfully, there are plenty of alternatives, and we're going to show you some of our favorite closure options that we've used on the Rogue Cloak or Explorer Cloak. Note, some of these options wouldn't work on a regular button up coat, but work very well for this wrap style.
You can watch this video, or read about the different closure types below, or both!
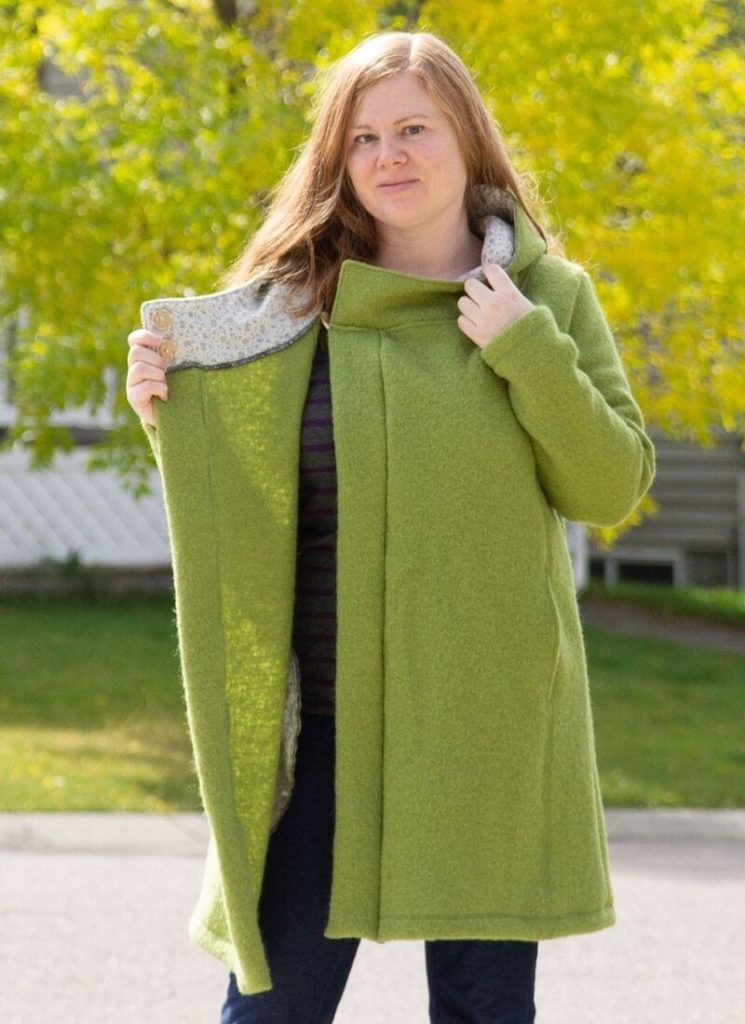
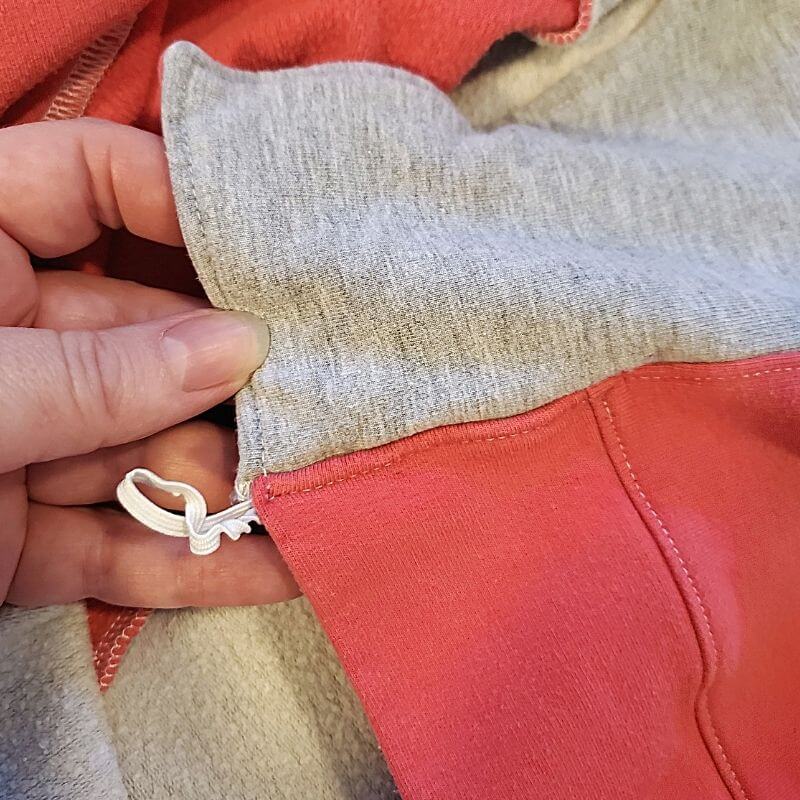
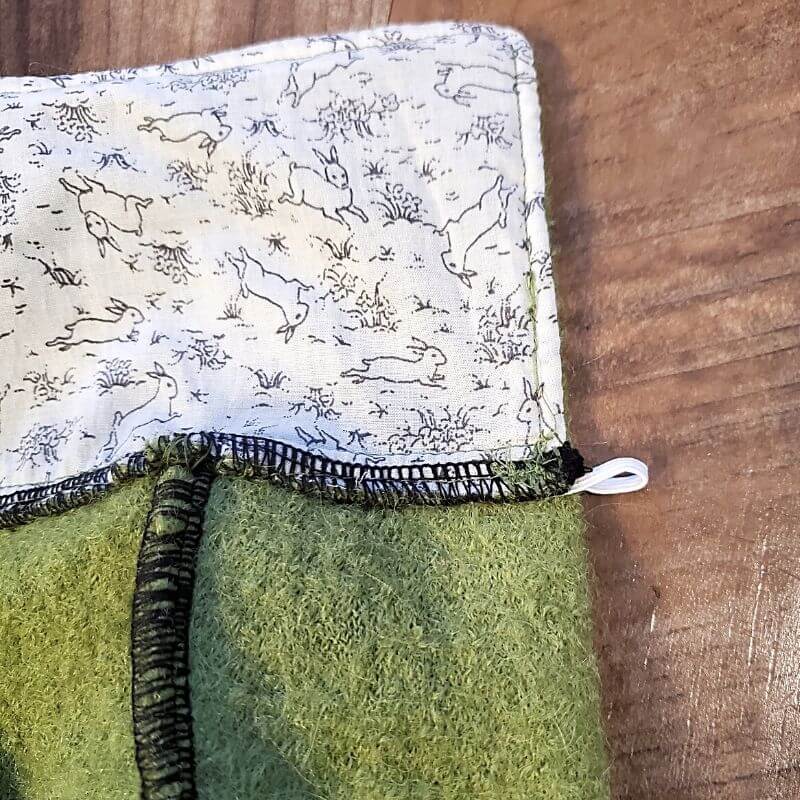
My preferred method for the inside of these cloaks is to add a small elastic loop. I simply fold it into the seam allowance before topstitching the hood seam. Then I try the jacket on, find the best place to put a button on the inside, and sew a button to the seam allowance.
WARNING: Make sure your elastic has good recovery! You can see how the elastic on the pink one has stretched way out of shape.

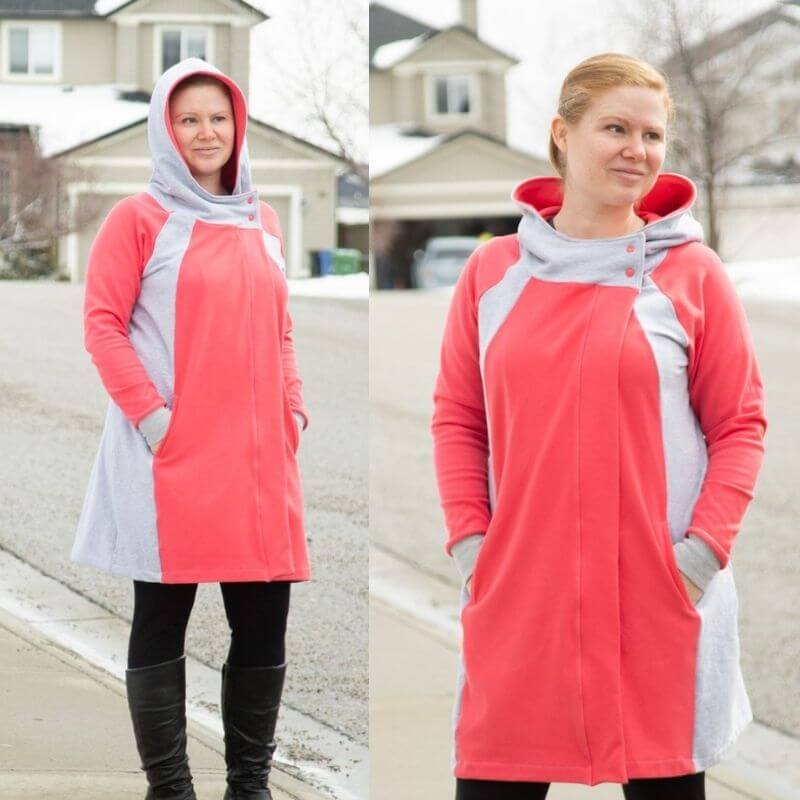
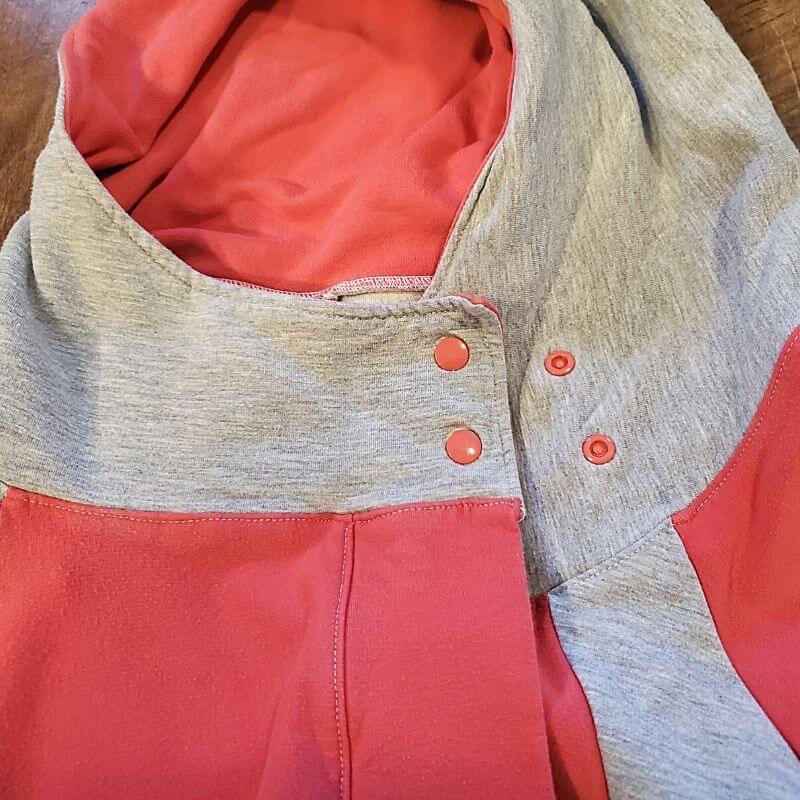
Plastic snaps (or really any snap that can be applied with a press) are a nice easy alternative to buttons. Just make sure that you use fusible interfacing (on the wrong side of your fabric) to stabilize thin or stretchy fabrics. For the Rogue Cloak, you'll need to apply it to the marked locations prior to assembling the hood.
Sew-on toggles are a nice easy option as well - I loved this toggle on my Rogue Cloak, but unfortunately the loop broke off and I had to replace it with a sew on snap.

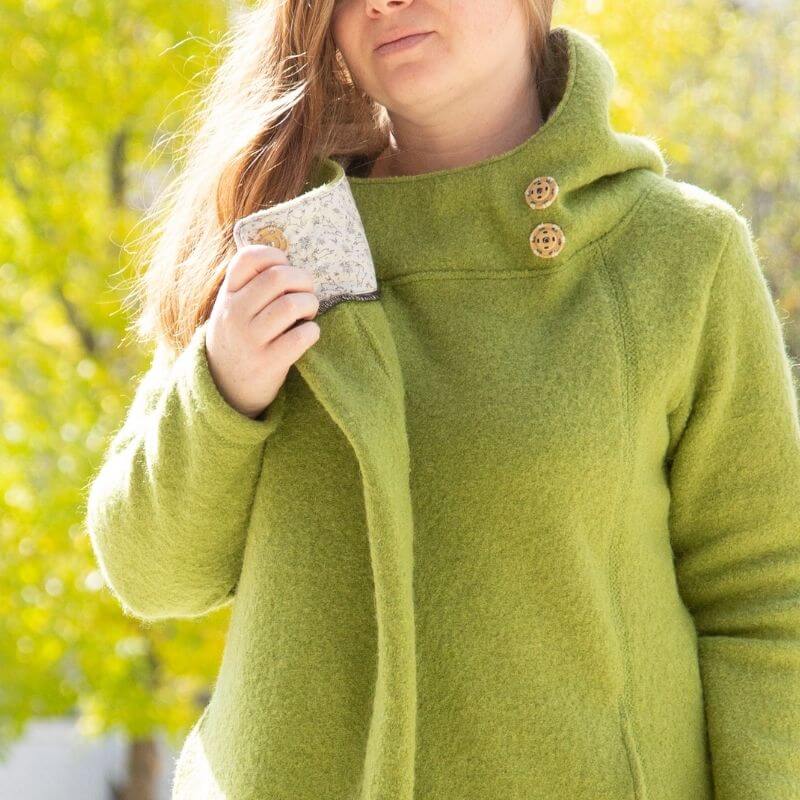
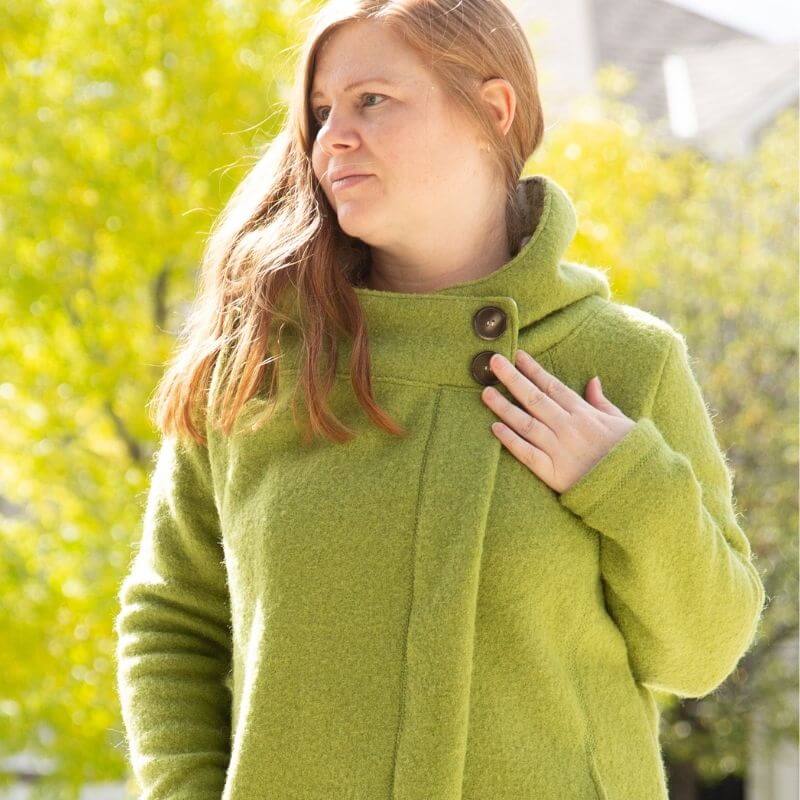
These are also very easy, and I love that they don't show from the front, allowing you to sew decorative buttons on the front!
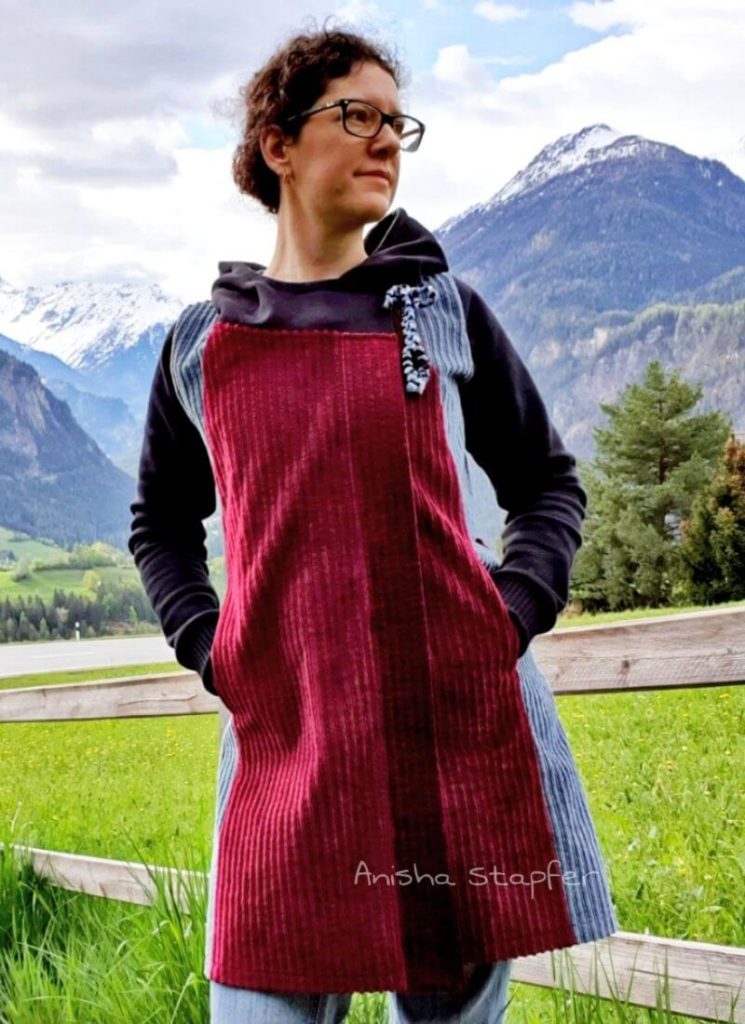
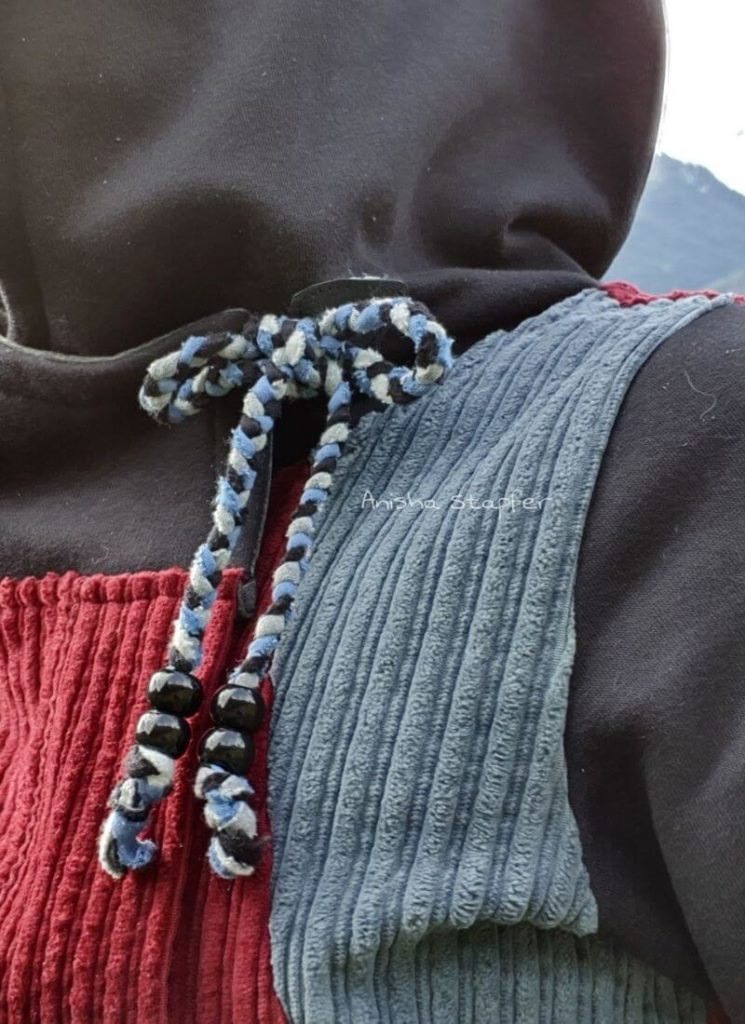
Our team member Anisha sewed ties into the seams of her Explorer Cloak - I love this look too!
We haven't tried all the possibilities yet - I have also spotted various clasps and magnetic closures in my local fabric store that would likely work well. If you can think of something we haven't listed, please share in the comments!
Thank you for these great alternate fastener ideas!
Do you think the Explorer could be a candidate for a quilt coat? I saw this coat on Instagram which is from an OOP New Look pattern, and I think the Explorer is the closest candidate! https://www.instagram.com/p/CZj_MVduYOO/
Hmmm it could be done I think, but the Explorer is meant to be unlined and on the lighter side for fall/spring, so you may need to size up, depending on the weight of the quilt. You might need a coordinating fabric for the front edges too, which are folded and would be really bulky if made from a quilt.
I am looking for a teacher for 3 or 4 zoom sessions on closures for a felters guild. Could you please contact me? Thanks.
Sorry, my schedule is jam packed and I can't add anything else in right now! Hope you find the right person.
Is there a tutorial picture, video or just instructions I can read about the Ties on the explorer? My dad just bought me a handmade apron. It goes around neck and armpits no tie on the back. The buttons on each side of the apron are like 2+ sizes smaller than the buttonholes. Plus I think little ties would look like bows and be so cute. I think I know how it's done but I'm not positive. Anyways please and thank you in advance🙂
Hi Stephanie - I did not make that one myself, but I believe the ties are just sandwiched into seams.