Printing a sewing pattern at home is really convenient, but sometimes it can be tricky to make heads or tails of the pages and how to put the puzzle together. Let's walk through the process step by step and go over the various methods, so you can easily assemble your next pattern and get to sewing more quickly.
Note: You can watch a full YouTube video covering this topic on our Sew PDF YouTube channel!
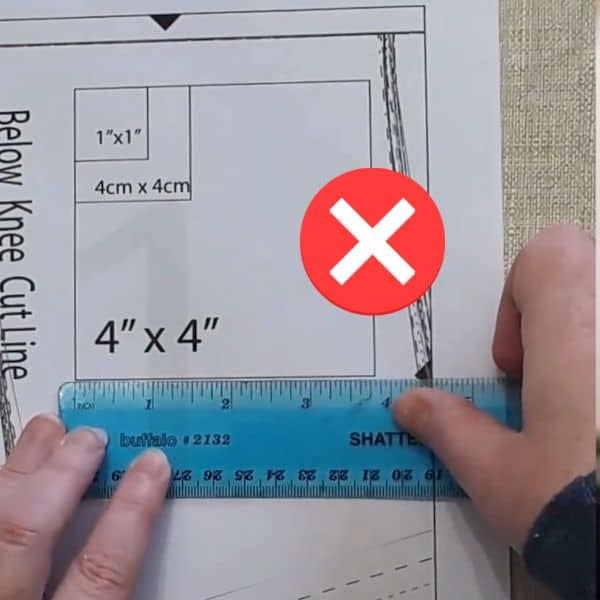
This is incredibly important, because if your pattern has not printed correctly, it can make assembly very frustrating and inaccurate. Even if you are able to easily piece it together, if the scale is not correct, your item will not be the correct size - which is a big problem when it comes to clothing.
Make sure to measure the scale square (or rectangle) on your pattern, and only proceed when it measures correctly. If you are having any troubles with printing, please check out our blog post on printing patterns correctly. Besides scale, it also covers a few other potential printing errors that you'll want to keep an eye out for, because these errors will make it more difficult to assemble your pattern.
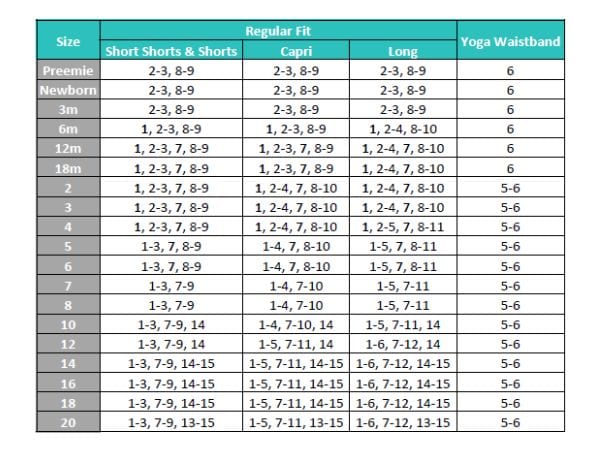
If your pattern has a lot of pages, most likely you do NOT need to print them all. With clothing patterns, you can usually skip some pages, unless you are making the largest size. Also, many PDF patterns have multiple options - various sleeve or pant/skirt lengths, optional pieces such as a hood, etc.
Most patterns will include a chart that you can reference, listing the exact page numbers needed for your size and options.
To the right (or below if you are on mobile) is an example of a print chart from the Maya Jane Leggings pattern for babies and kids, by Buttons and Blueprints.
With an extensive size range like this (preemie to youth 20) it makes a big difference in how many pages you need, as well as you can see there are multiple length options to choose from, which also affects page count
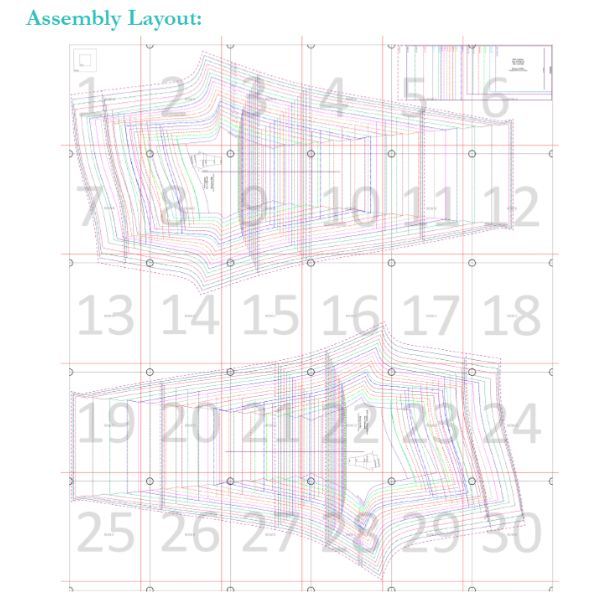
If the pattern doesn't include a print chart, another option is to have a look at the assembly grid/layout and see if you can eliminate any pages with pieces/sizes that you don't need.
For example, in the assembly layout for Maya Jane leggings (shown to the right/below on mobile) you can tell at a glance that pages 13-18 will not be needed for the smaller sizes.
If you look closely at the labels (you might have to go to the individual pages to see what the labels say - you can tell that there is text on pages 8 and 22), you may also be able to determine that the top set of pages is for regular fit and the bottom set of pages is for diapered fit. The piece in the upper right hand corner is the yoga band, which isn't needed if you are making the elastic waistband.
If you use the layers feature in Adobe Reader to remove the sizes you don't need, that makes it even easier to scroll through the individual pages and eliminate any blank pages that you won't need.
Thankfully, this isn't necessary when you have a pages-to-print chart, which is included with this pattern (and most patterns with multiple options tend to provide a chart).
Tip: Pattern descriptions in the Sew PDF shop always include a list of tutorial features, such as print charts. If this is an important feature for you when using PDF patterns, you can check if a chart is included before purchasing!
Personally, I have tried both and I am a tape girl, but many people swear glue sticks are easier. While it is certainly easier to make adjustments before the glue dries (if you don't get it lined up quite right), I find that the pages also come apart easier after the glue is dry, when you don't want them to.... I'm also much faster with tape, but to each their own!
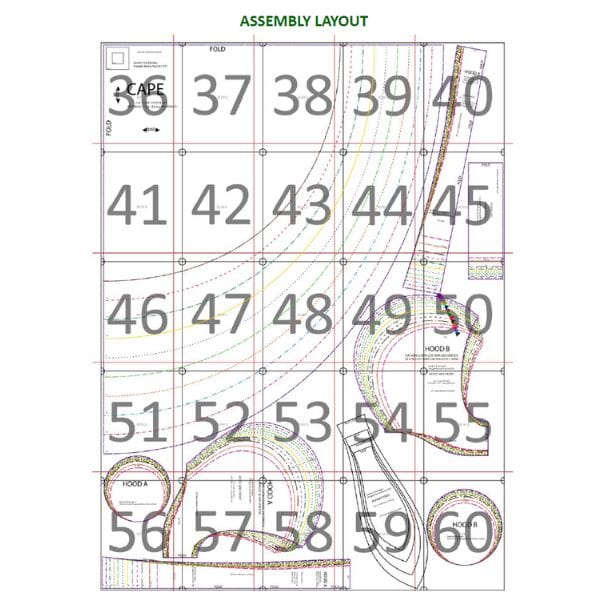
Each pattern should have an assembly grid to follow - it is usually in the tutorial, but sometimes it is on the printed pattern pages themselves.
Here are a couple of examples of assembly grids:

I recommend laying out all the pages before you start assembling, in the correct order corresponding to the assembly grid.
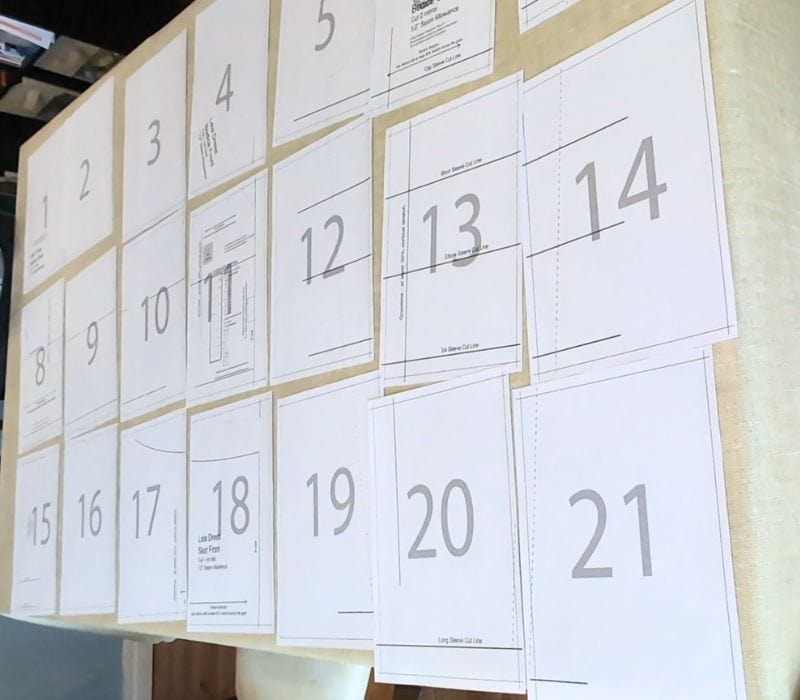
Here's why I recommend laying out all the pages before you start assembling:
There are two main assembly methods for PDF patterns (with a few slight variations that we'll discuss later):
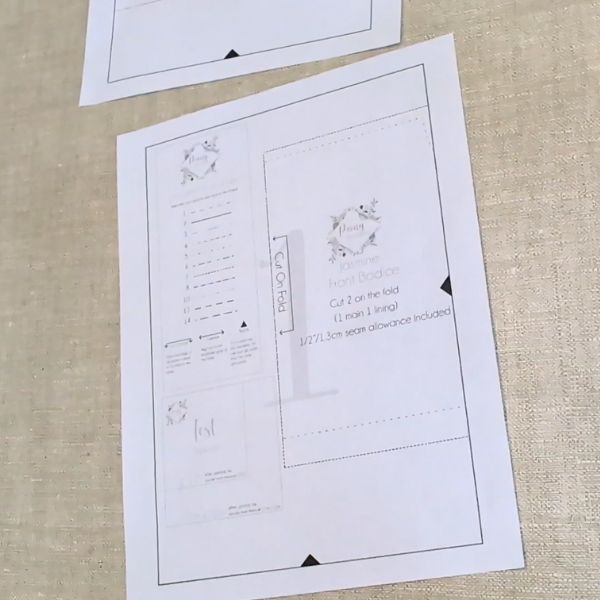
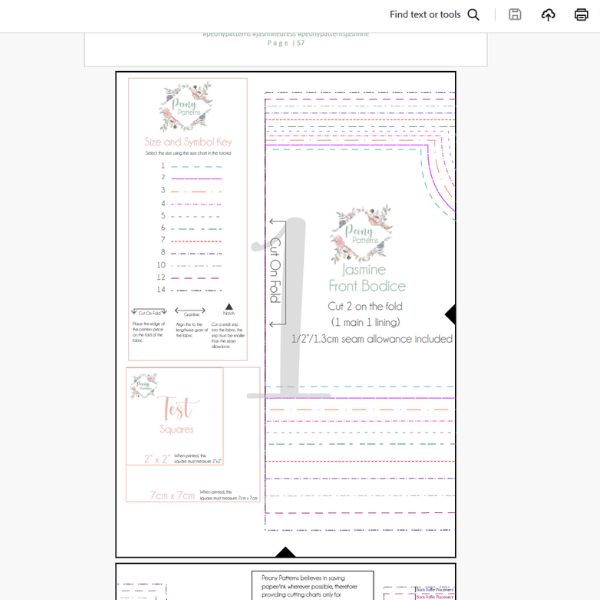
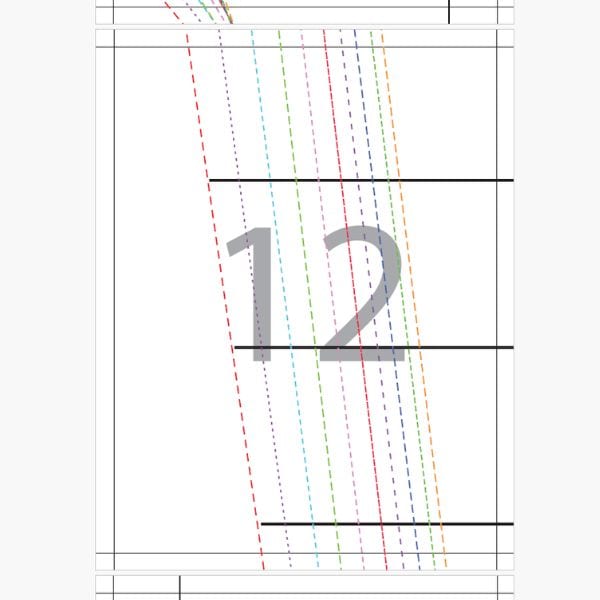
I will quickly mention that there is a rare 3rd option - Edge-to-edge Patterns, which are intended to simply tape together with no trimming or overlap. These can be inaccurate if your printer alignment is not perfect, which is why this method is rarely used. I have only seen one designer using this method (and those patterns are no longer available for purchase) but I wanted to mention it in case anyone happens to come across it.
Tip: One common mistake for first-time PDF pattern users is to cut out the pattern pieces on each page before taping them together. Do not do this! It is far too easy to lose track of what goes where, and you will be missing a lot of your assembly guidelines.
Watch here to see these examples in action on our YouTube video about assembling patterns!
1. Trim all of the edges and tape them together
Pro: With this method the pattern folds up very nicely to save it for reuse.
Con: Takes a long time to cut all the edges, and it needs to be very accurate cutting in order for it to tape together well.
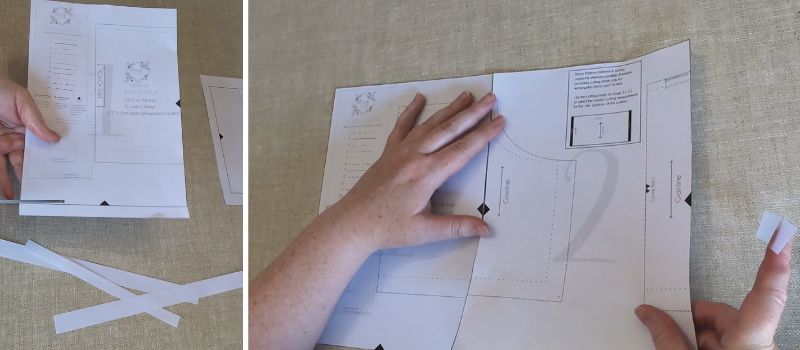
2. Trim 2 edges and overlap
Pro: Saves some time and it's very easy to see where the overlap should align
Con: Still takes more time than methods 3 and 4
SLIGHT TWIST ON THIS METHOD: instead of trimming, fold the edges under - this is more bulky but faster than trimming.
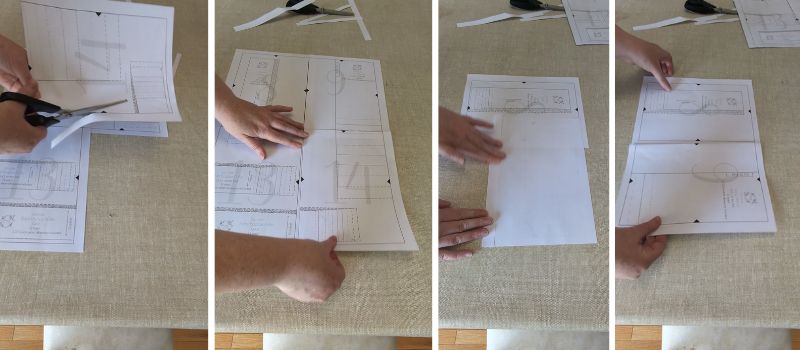
3. Cut the corners diagonally and align corners to assemble
Pro: Can cut corners quickly by layering pages together to cut. Less bulky than folding edges.
Con: Must be accurate when cutting corners, and may need to use a window to see through the paper and fill in the missing lines in the white gaps.
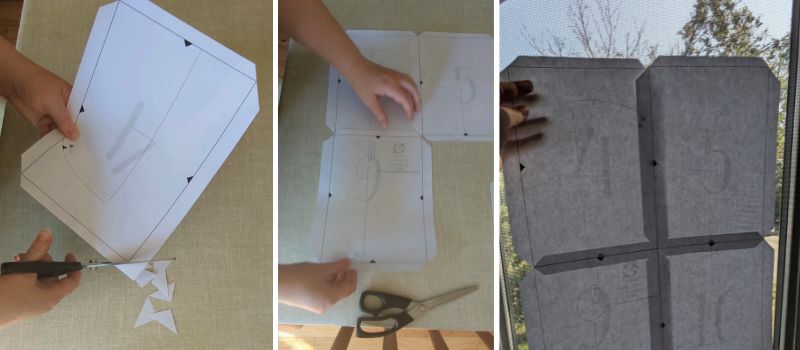
4. Simply look through the edges of the paper and overlap (easiest if done on a window)
Pro: Much faster than trimming edges.
Con: Unless you have a very well-lit room, you will likely need to do this on a window (and will need a large window if you're assembling a big pattern) which is more cumbersome than assembling on a table. You will also need to fill in missing lines in the white gaps.
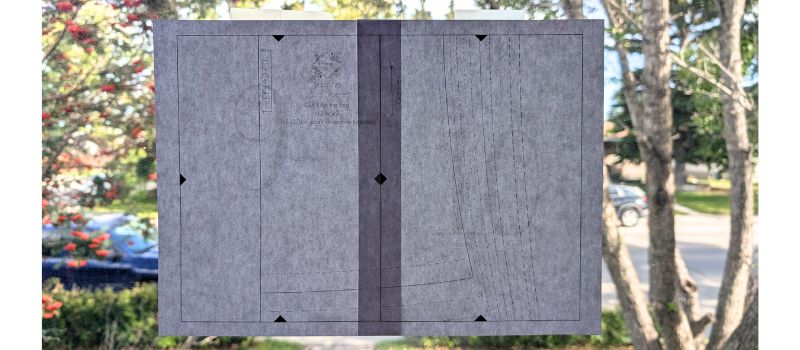
Trimless patterns are intended to be overlapped, and designers use a variety of methods to indicate how much to overlap the pages. In a well lit room, you can usually see through the pages enough to do it without a window.
While the pattern files have lines right to the edges, when printed there is usually still a small gap (unless your printer has a "borderless" setting). This gap is minimal enough that you can most often cut the pattern piece without needing to fill in the missing area. On rare occasions you may need to put it on a window to fill in what's missing.
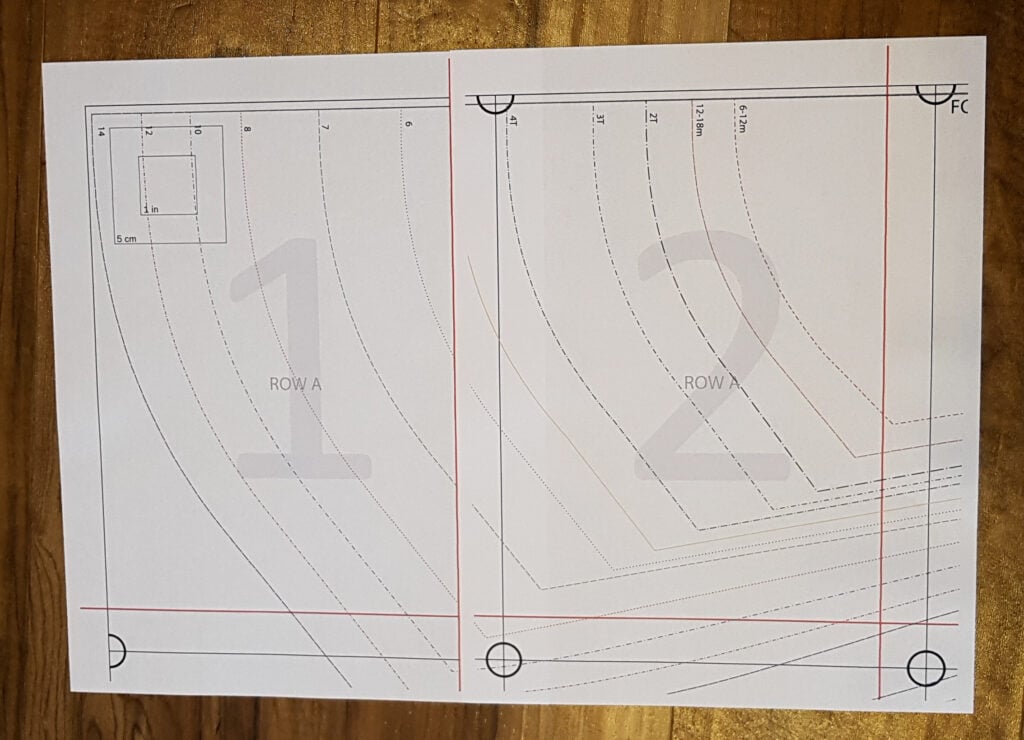
Here are some examples of trimless pattern assembly and various styles of alignment guides:
Watch here to see these examples in action on our YouTube video about assembling patterns!

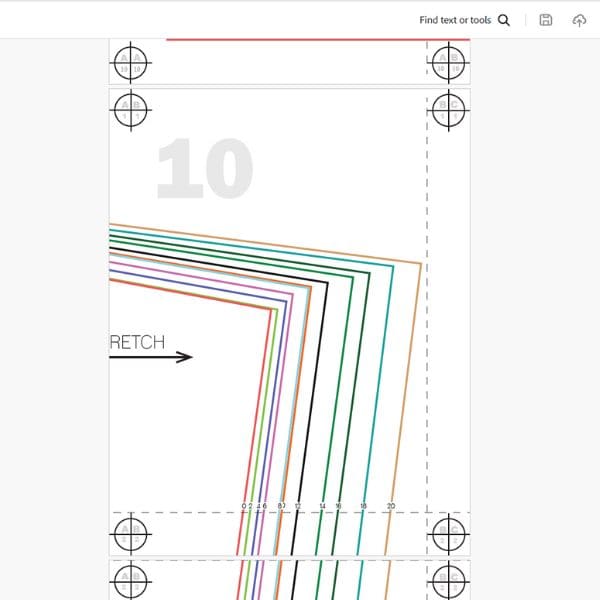
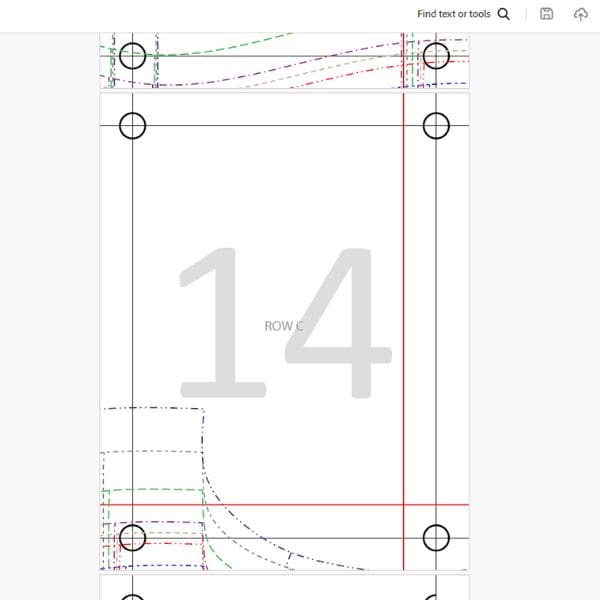
Sometimes the guidelines can be a bit confusing, as some of them are meant to overlap, and some are meant to have the edge of the next page butted up to the line.
Generally, if the lines form a full rectangle around the edges, (like example 1 above, and the black lines in example 3), then the lines are meant to overlap each other, and you could choose to assemble it using one of the trim methods, if you prefer.
If there are lines on only two edges (like example 2 above, and the red lines on example 3) then you are supposed to "butt up" the edge of the paper against that line.
There is one big problem with methods that use the edge of the paper for alignment: if your scale is out even a tiny bit (it's possible for a 1 inch square to measure correctly, but the full page to still be out a small amount) then the line will be in the wrong place. Also, if printer alignment is out at all, your pattern will align incorrectly.
This is why it is very important to have checks and balances that can be used, like the circles in examples 2 and 3, which can be overlapped to ensure accuracy. If your pattern only has two lines, and no other alignment markers, it will be hard to tell if your pattern is being assembled accurately.
Let's take a closer look at example 3 again: this pattern assembly method is used by Goober Pea Designs and Buttons and Blueprints pattern. It includes both black lines (intended to overlap), AND red lines, which at the correct scale and perfect print alignment, should allow you to butt up the edge of the page with the red line.
HOWEVER, if your printer alignment is out, that's ok! Just match up the black lines and circles (or in other examples, whatever symbols are in the corners) and ignore the red lines.
Note: For these patterns in particular, you can actually turn off the layer with the red lines, if you find that they don't work for you.

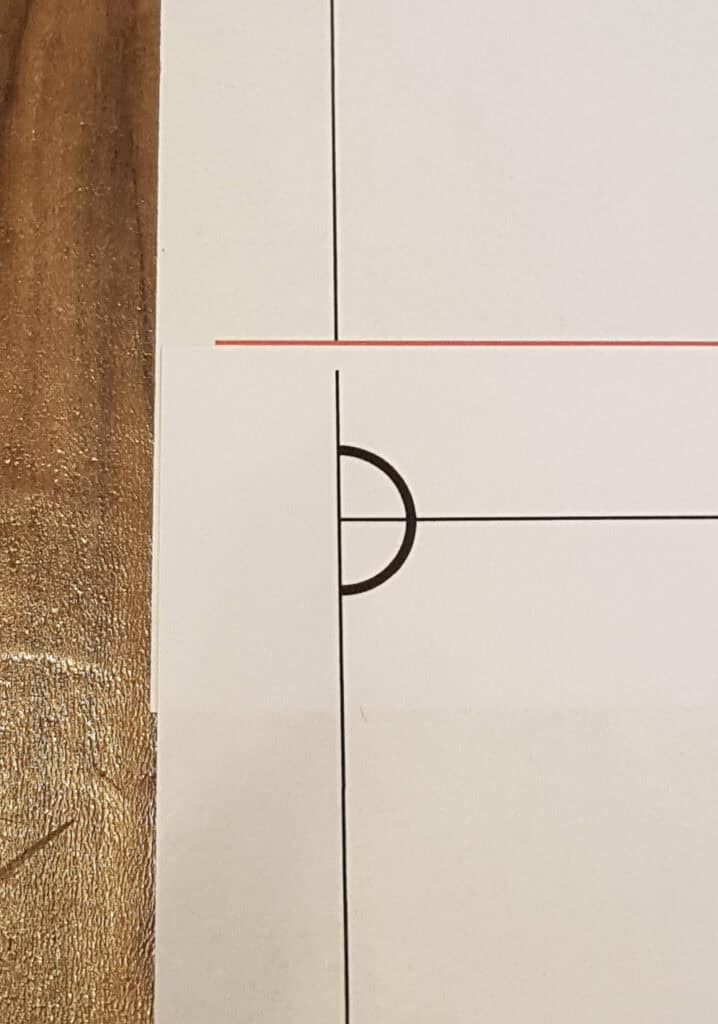
Here is an example of printer alignment trouble - when the printer pulled the paper, one page went through in a slightly different position than the other, which made the black lines different distances from the paper edge.
Finally, once all your pages are assembled, you can cut your pattern pieces out! You can use paper scissors, or if you have a cutting mat, you can use a rotary cutter (just make sure you write "paper" on it with a sharpie and don't use the same one for fabric, as it will dull quickly cutting paper).
Now that you know all the ins and outs of printing and assembling PDF patterns, check out our collection of PDF patterns in the Sew PDF shop - over 150 patterns from more than 25 different designers! And if all of this seems like too much work for you, then you may want to look into Large Format Printing for PDF patterns, on blueprint sized paper.